Welcome to the series of steps to set up Zentric and have your perfect payroll!
Before you begin, it is very important that you have the following information at hand:
- Information about your employees
- Payroll information
- Company Identification Card / Tax Status Statement
- AFIL-01
- EBA (Risk Premium, Contribution Base Salaries, INFONAVIT Credits)
This user manual provides detailed guidance on how to set up, process and stamp payroll using Zentric's cloud platform.
It is designed to help you understand the steps necessary to manage payroll effectively and comply with tax and legal requirements.
Section 1: Registration of Workers
This process can be done individually or in bulk. Enter "workers" in the side menu.
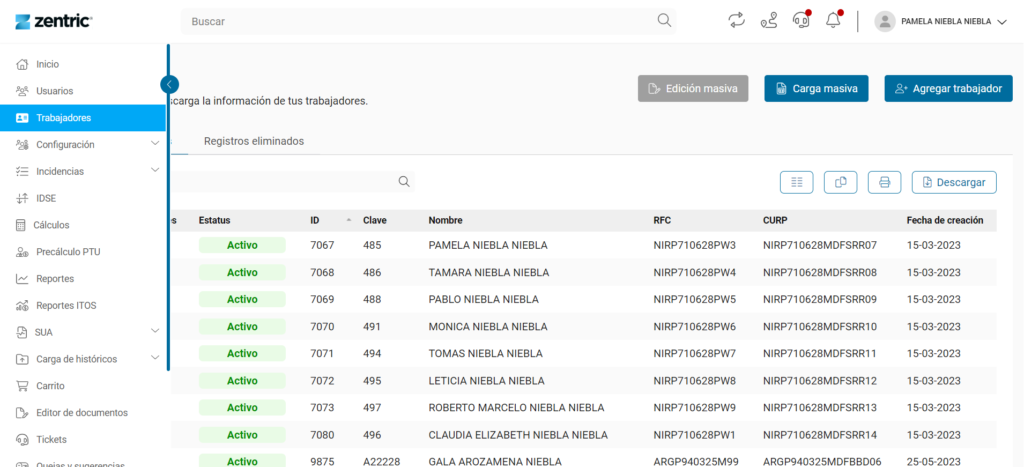
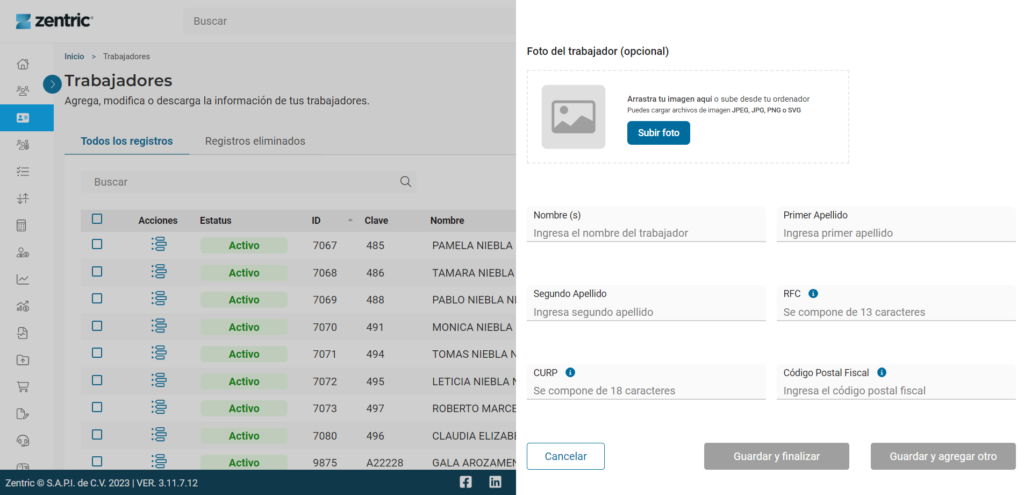
Individual Registration:
- Enter each worker's information individually (name, last name, RFC, CURP and tax zip code).
Mass registration:
- For a bulk load of workers, follow these steps:
- Click on the "Bulk Upload" button on the platform.
- Download the layout provided in Excel file format. This file is a template to be filled in with the workers' information.
- Enter the workers' information in the Excel template according to the indications provided.
- Once you have completed the template with the workers' data, return to the Zentric platform and click "Next".
- Paste the data you have filled in the Excel template into the Zentric platform. Then click on the "Preload data" button.
- Verify that the information is correct.
- Click on the "Save" button.
Section 2: Catalog Configuration
- Access the configuration section and select "Catalog".
Complete the required fields for the company:
- Name (required field)
- Employer registration (required field)
- Branch (required fields)
- departments (optional field)
- positions (optional field)
Section 3: Calendar Settings
Setting up the calendar is a crucial step in defining pay periods and key dates for payroll in the Zentric platform.
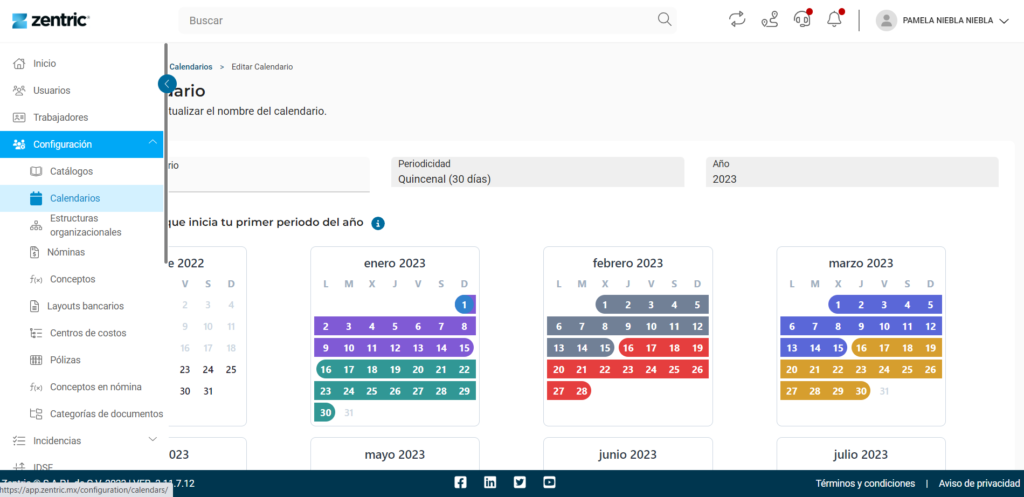
Follow these detailed steps to set up the calendar correctly:
Step 1: Selecting the Calendar Type
Start by selecting the type of calendar that best suits your company's needs. You can choose from several options, including weekly, biweekly, monthly, decennial or quadrennial.
*For biweekly and monthly calendars, you will also be asked to specify whether the pay periods will be calendar days or fixed (30 days).
Step 2: Selecting the Start Date for the First Period of the Year
After choosing the calendar type, select the date on which your first fiscal or payroll year period began. This date is essential for establishing the structure of the pay periods.
Step 3: Setting Pay Dates and Bonus Dates
Click the "Next" button to configure the payment dates throughout the year. You can specify the payment dates for each period according to the type of calendar selected.
In addition, you will have the option to enable the calculation of the Aguinaldo in a specific period. This function allows you to define when it will be automatically calculated on the platform.
Section 4: Organizational Structure Configuration
Setting up the organizational structure is critical to establishing a clear hierarchy in the Zentric platform. Follow these detailed steps to set up the structure effectively:
- Step 1: Assign a Name
Start by assigning a descriptive name to your organizational structure. This will help identify and organize the company's hierarchy. - Step 2: Configure the Structure
Use the "+" button available at each level to add elements to the structure gradually, following this basic hierarchy.
Making sure to have at least the following hierarchical levels: company, employer registration, branch and workers at the end of the structure.
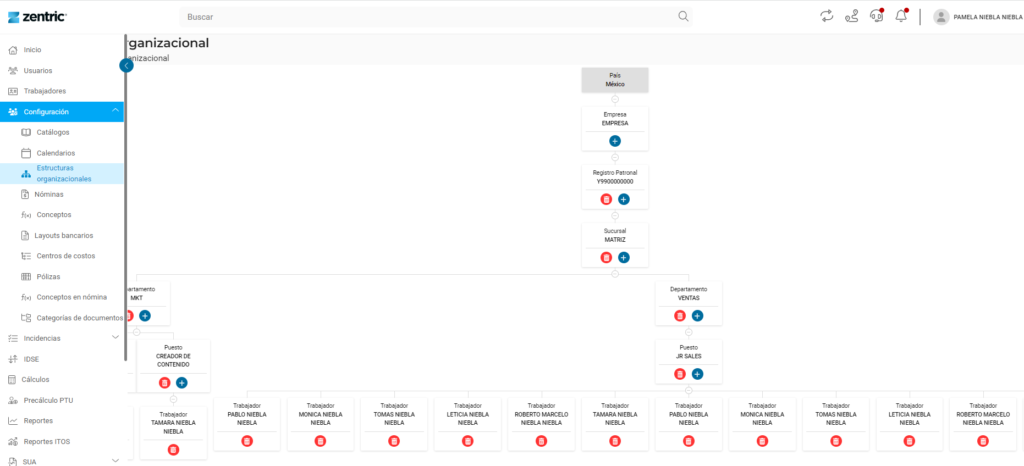
a. Company: Add the main company as the top level of the structure. This will be the main entity to which other elements will be associated.
b. Employer Registration: Associate the employer registration corresponding to the company. This level is essential to identify the company before the tax authorities.
c. Branch: Add below the employer registry to which they belong. Each branch must be clearly linked to its corresponding employer registration.
d. Workers: At the end of the hierarchy, add the workers and link them to the branches or the employer registry to which they belong.
It is important to note that this structure will be deployed in a logical and hierarchical manner, which means that under the main company there will be the employer records, under the employer records there will be the branches, and so on, always ending with the worker.
Section 5: Payroll Configuration
- Assign the name by which you would like to identify it.
- Associate the organizational structure and the configured calendar.
- Select the Start Period to Calculate Payroll.
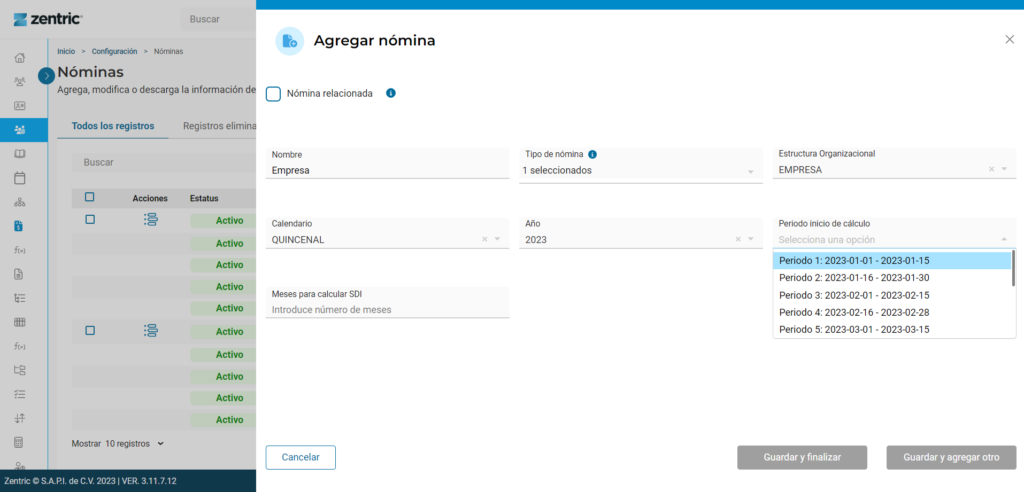
*It is recommended that this period starts at the beginning of the month. The platform automatically makes monthly adjustments, so having this accurate information is essential for a proper calculation.
Section 6: Worker data configuration.
Once you have set up the payroll structure and calendar parameters, the next step is to enter the workers' personal information. You can do this in two ways:
Individual Record: Worker Data
- Access the "Workers" module.
- Select the worker.
- Complete the required fields for each worker (Fields with an * are mandatory).
Massive registration of worker data
If you prefer to enter worker information efficiently, use our layouts:
- Access the "Workers" module.
- Select the option for "Bulk Load".
- Download the layout provided in Excel file format. This file is a template to be filled in with the workers' information.
- Enter the workers' information in the Excel template according to the indications provided.
- Once you have completed the template with the workers' data, return to the Zentric platform and click "Next".
- Paste the data you have filled in the Excel template into the Zentric platform. Then click on the "Preload data" button.
- Verify that the information is correct.
- Save
This process must be carried out with all the mandatory fields. That is, Payroll Data, IMSS Payroll, Payroll Movements, Affiliation Movements and Bank Data.
Note: Make sure that in the section Payroll Data the field "Last Day Calculated" accurately reflects the last day of the previous pay period. This data is essential for payroll calculations to be performed correctly.
Section 7: Configuration of Additional Concepts
Zentric allows a detailed configuration of additional concepts in the payroll to adapt it to the specific needs of your company. Follow these steps to configure the additional items accurately:
Step 1: Access the Concepts Configuration.
In the side menu, access the configuration section and select "Concepts".
Step 2: Explore Predefined Concepts
Within the concepts module, explore the wide range of predefined concepts that the platform offers, including more than 100 options.
Step 3: Assigning Global, Optional or Individual Concepts
To configure additional concepts, select the desired concept and define its "Concept Type", which can be one of the following:
- Global: These concepts are automatically applied to all workers registered in the platform and are useful for items such as base salary.
- Optional: Configure per-incident concepts, such as overtime, commissions or bonuses, to be applied according to circumstances.
- Individual: Assign concepts to specific groups, such as companies, departments, positions or employer records, allowing detailed payroll customization.
Step 4: Configure Concept Details
Once the concept type is selected, configure the calculation formula.
Step 5: Save
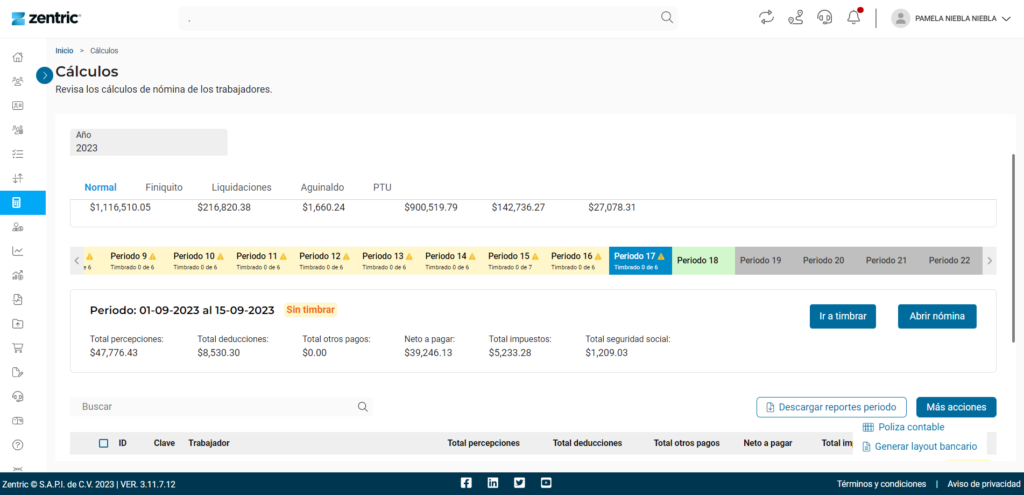
Section 8: Calculation Module
Use the calculation module to process the payroll, checking with different reports to ensure the accuracy of the calculations.
Stamping Process
To stamp, it is important to have the digital stamps in the platform, following the instructions below
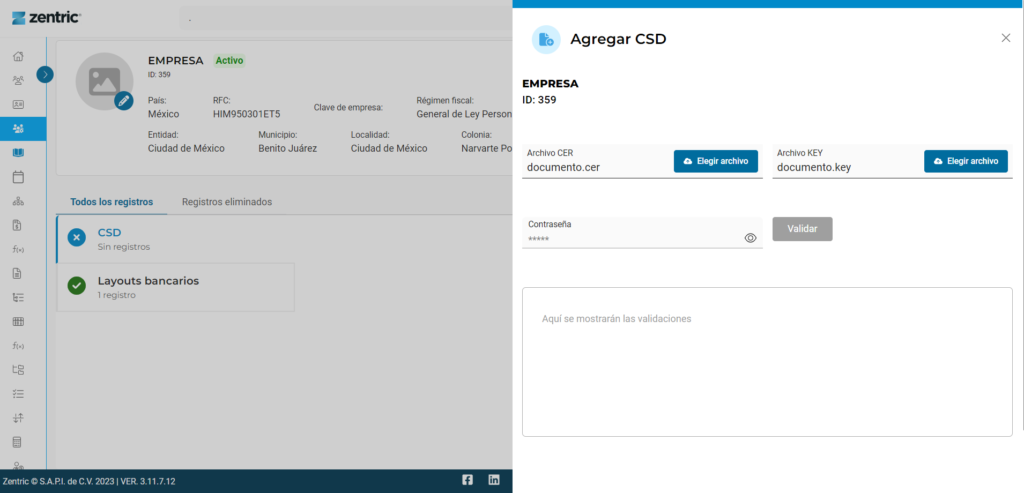
Step 1: CSD loading
- Access the configuration module and select "catalog".
- In "Company" select "View detail".
- Add the Digital Seal Certificate (CSD).
Step 2: Verification of Calculations
- Select "Calculations" in the side menu.
- Click on the "View detail" button of the desired payroll.
- Download the desired report.
- Close the period to enable new functions.
- Perform stamping to comply with fiscal and legal requirements.
- Generate bank layouts and accounting policies as needed.
Use of IDSE
Use the IDSE module to send affiliation movements directly to IMSS. This includes the steps to register the FIEL or PFX, consult movements, send them individually or in bulk and consult IDSE responses.
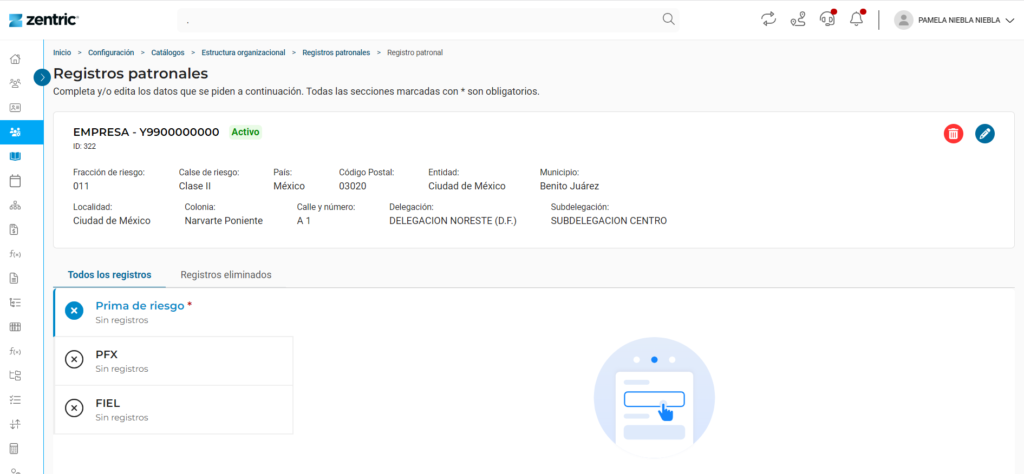
Step 1: FIEL or PFX Registration
Go to the Configuration section and select "Catalog".
In "Employer Registration", add the FIEL of the legal representative or the PFX corresponding to the employer registration. The platform will perform a validation to ensure that the information is correct and valid.
Step 2: Using the IDSE Module
- Go to the IDSE module on the platform.
- Select the employer registry for which you wish to consult movements.
- Choose a date range for the movements you wish to send or consult.
- Select the desired type of movement, which can be registration, deregistration, reinstatement or modification.
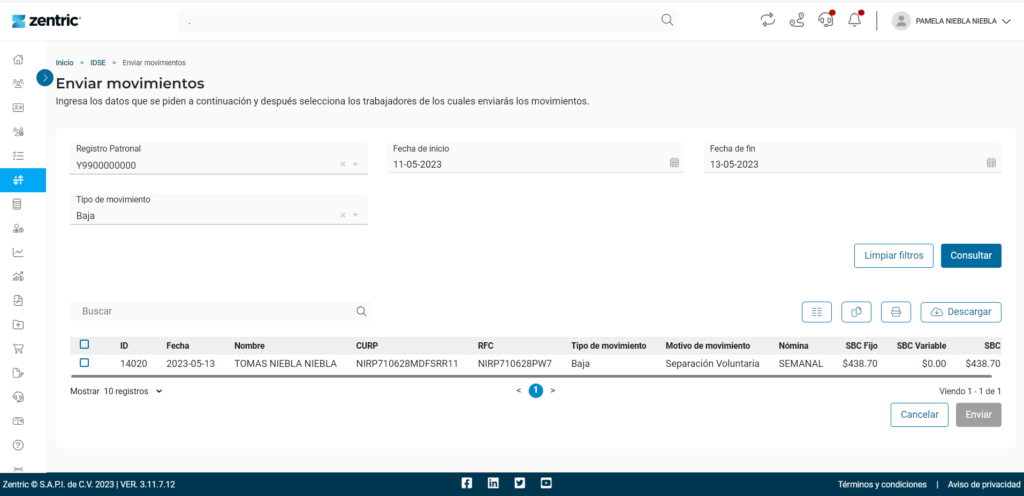
Step 3: Sending Movements
You can send transactions to IDSE individually or in bulk, depending on your specific needs.
Step 4: Query Movements and Responses
In addition to sending transactions, you can use the IDSE module to consult previous transactions and IDSE responses. This facilitates the tracking of processes and transactions.
Discharge Process
Step 1: Zentric Worker Registration Process
Individual load:
- Access the "Workers" module.
- Select "Add worker".
- Fill in the required fields (Fields marked with an asterisk (*))
Massive load:
If you prefer to enter worker information efficiently, you can use our layouts:
- Access the "Workers" module.
- Select the option for "Bulk upload".
- Download the layout provided in Excel file format. This template must be completed with the workers' information.
- Enter the workers' information in the Excel template following the indications provided.
- Return to the Zentric platform and click "Next".
- Paste the data you have filled in the Excel template into the Zentric platform and click on the "Preload data" button.
- Verify that the information is correct and save.
*Mandatory fields: "Payroll Data", "IMSS Payroll", "Payroll Movements", "Affiliation Movements" and "Bank Data".
Make sure that in the "Payroll Data" section, the "Last Calculated Day" field reflects one day before the employee's date of entry.
Step 2: Add to the Organization Chart
To incorporate the worker into the organizational structure:
- Go to the side menu.
- Select "Configuration".
- Go to "Organizational Structure".
- Edit the existing structure.
- Add the new worker to the corresponding position.
- Save the changes.
Discharge Process
Step 1: Indicate the worker's discharge
- Access to the Workers Module
- Select Worker to be terminated and click on "See detail".
- Select the option to edit the worker's "payroll data".
- Add the date of termination and the reason for termination.
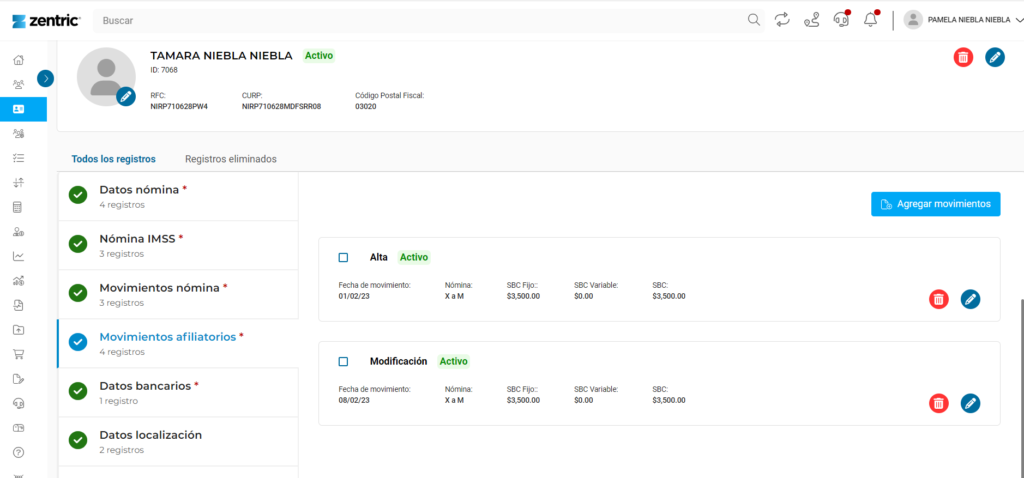
Step 2: Create Affiliation Movement
- In the worker's profile, select "Affiliation movements".
- Add a new affiliation termination transaction for the worker.
- This must include the date of termination and the Base Contribution Salary (SBC) corresponding to the date of termination.
Step 3: Tying the Periods in Calculations
- Go to the "Calculations" module.
- Tie the periods in "Severance/Settlement" with the regular payroll.
This ensures that the calculations are properly performed and adjusted to the worker's leave situation.
By following these additional steps, you will be able to effectively manage the employee termination process in the Zentric platform.
INFONAVIT Credits
- Access to INFONAVIT Movements Section
- Select the worker for whom you wish to calculate the INFONAVIT credit.
- Click on "View detail".
- Within the worker's details, select the "INFONAVIT Movements" tab.
- Add the information corresponding to the worker's credit, including the necessary details.
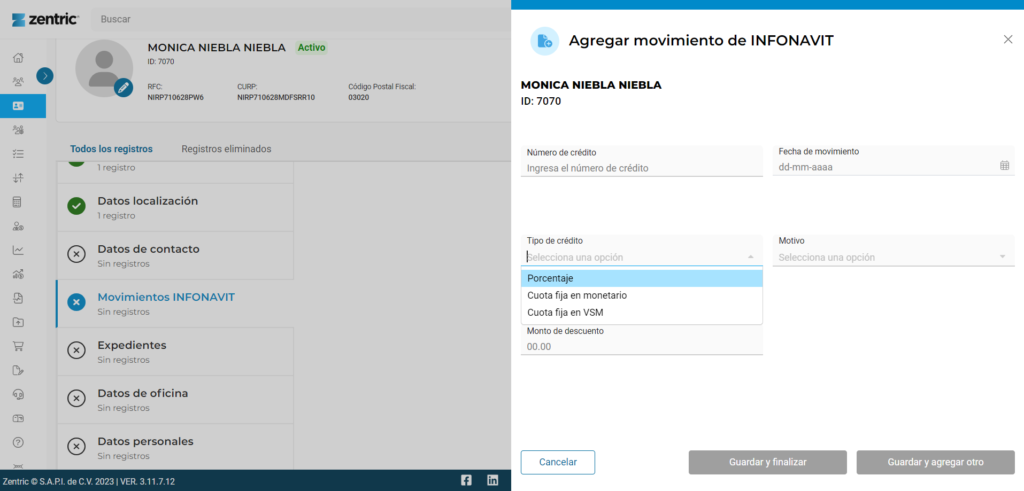
Once you have entered the INFONAVIT credit information, the calculations will be automatically updated and reflected in the platform.
Note: The information provided in this manual is subject to change according to platform updates. Please refer to the updated Zentric.mx documentation for accurate and detailed information.